
Things are calming down, so I am ready to start posting again...
This is a game using Babylon 5 Wars. It is the start of a small campaign I am doing.
The setting:
After the battle of Yavin 4 and the first Death Star being destroyed, the Rebellion had a great time of growth even though the Empire was still very strong.Soon, the Rebellion started moving in bigger ways. After the Mon Calamari joined the alliance, they started bringing in some Mon Cal Cruisers.
This campaign takes place in the remote Eldark Sector. The sector is in the Outer Rim. It has a few dozen systems, that has some good resources as well as a couple of older shipyards. It is remote enough that the Empire has only allotted a small fleet do defend it. It is a perfect target for the Rebellion to turn.
For the campaign, the Rebellion has allocated on MC80a cruiser, a couple of Assault Frigates, and about a dozen other ships as well as a few squadrons of fighters.
The Game:
For this game, Rebel spies have detected a single Star Destroyer guarding a system. It only has 2 support ships, so it seems like a good opportunity to weaken the Imperial forces in the sector.The Opponents:
The Rebels - 1 MC80a cruiser, 1Assault Frigate, 2 Nebulon B Frigates. 3 squadrons of X-Wings, 2 Squadrons of A-Wings, 1 Squadron of Y-Wings, and 1 Flight of B-Wings.Imperials - 1 Imperial Star Destroyer II, 2 Carrack Class Cruisers. 4 Squadrons of Tie Fighters, 3 Squadrons of Tie Interceptors, and 1 Squadron of Tie Bombers.
The odds favor the Rebellion, but they have to escape with as many of their capitol ships as possible, and not too many fighter losses, because they don't have a lot of replacements!
Round 1
 |
| Imperial Deployment |
 |
| Rebel strike group |
The rebels decided to drop in from two different locations and hopefully split the Empire forces. On this turn the Rebel Assault Frigate along with one squadron of X-Wings, and the Flight of B-Wings drop in on one flank. The Empire quickly dispatch their patrolling TIEs and launches two more squadrons.
Round 2
The shooting starts. The Assault Frigate opens fire on the Star Destroyer, but only weaken the shields. The first flight of TIEs draw close and the X-Wings engage destroying 3 TIEs. The Star Destroyer returns fire on the Assault Frigate blowing through the front shields and doing some minor damage to the Frigate's hull.
Round 3
 |
| 2nd Rebel strike force jumps in |
The second task force of the Rebels drop in, and the commander of the Star Destroyer starts to get worried.
The TIE squadron and the X Wings continue to fight. A couple of X-Wings take some damage, but they annihilate the TIE Squadron.
The B-Wings fire at the first Carrack and manage to weaken its shields. The 1st Squadron of TIE Interceptors arrive and launch into the B-Wings destroying one and damaging the other.
The MC80a opens fire on the ISD with all of the guns it can manage. It does heavy damage to the shields of the star Destroyer but can't get through.
The Assault Frigate fires on the first Carrack, but has poor fire control and only does minor damage to its shields. It also fires point blank at the oncoming TIE squadron and takes one out.
Finally the ISD opens fire on the Mon Cal cruiser, but unfortunately many of its weapons are still recovering from the opening salvo at the Assault Frigate. It takes out the Mon Cal's shields, but fails to do any significant damage.
Turn 4
Things really heat up this round!
The TIE squadrons move to intercept the Mon Cal and its fighters. There are some long range shots fired and some of the X-Wings take damage, but none are destroyed. However several TIES go up as well as a couple of TIE Intercepters.
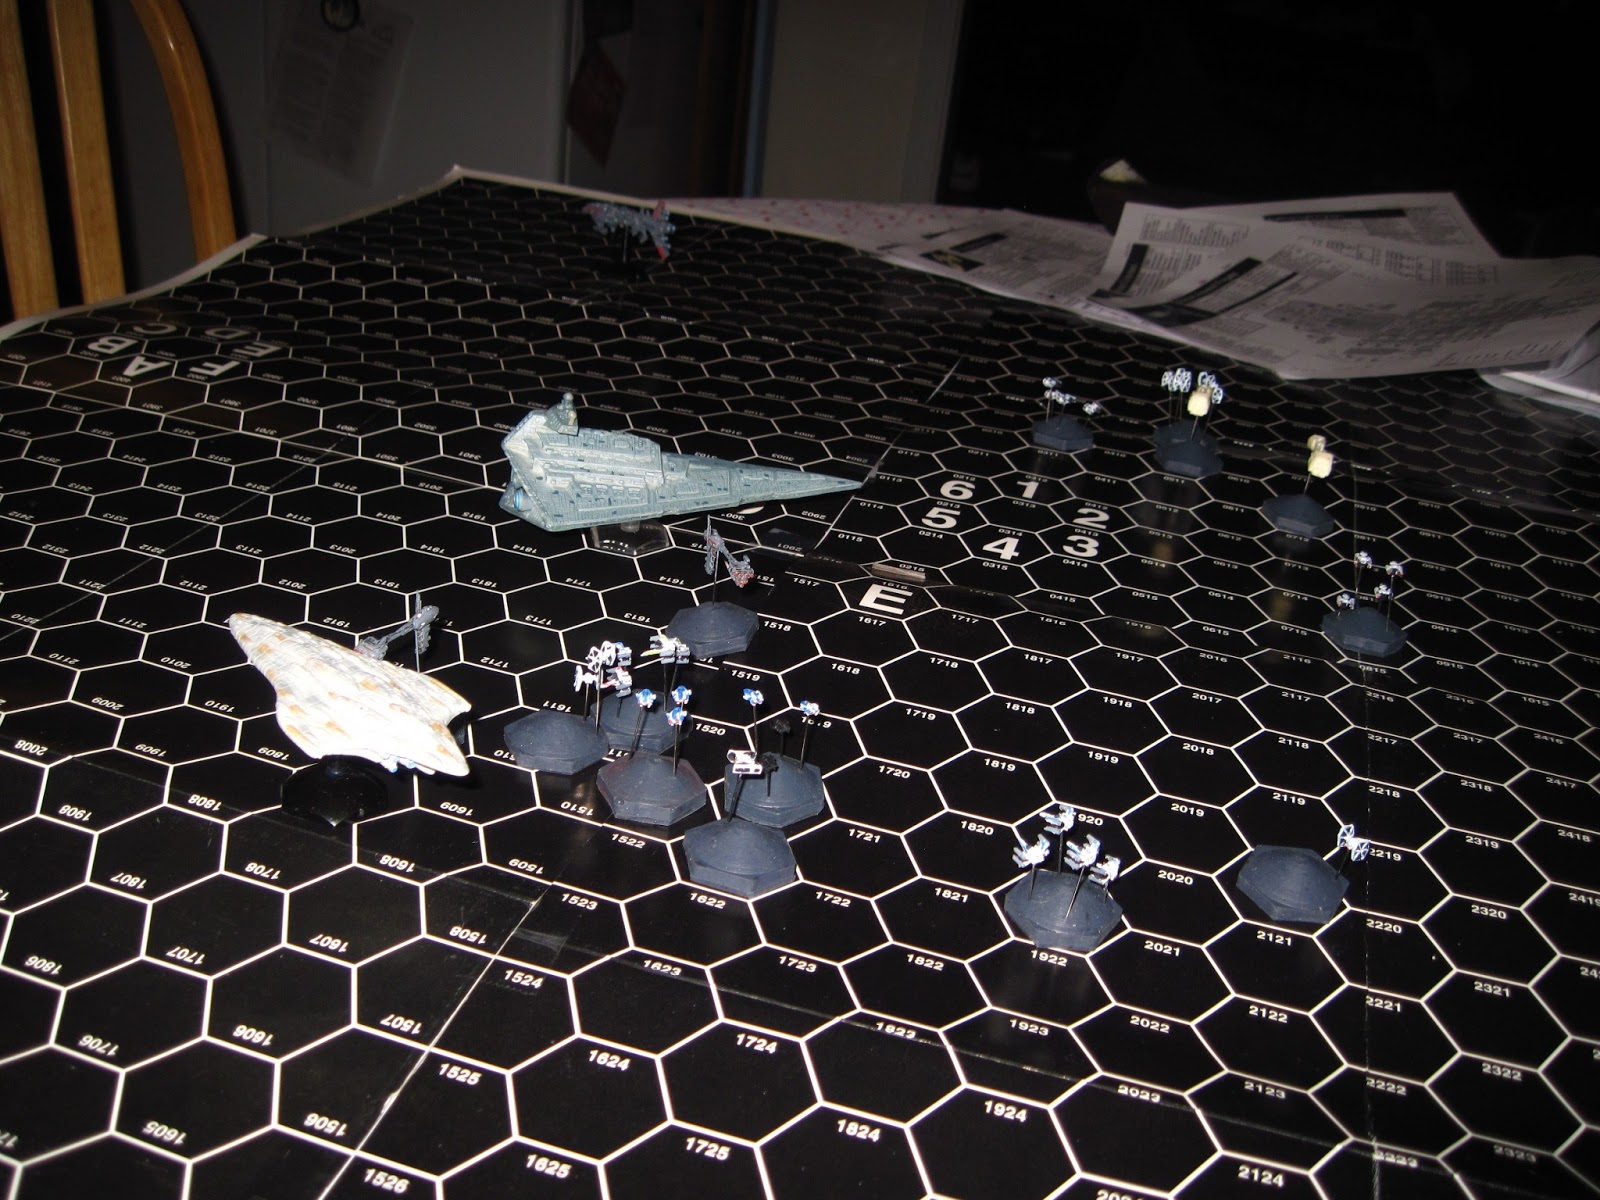
 |
| A view of the action |
The ISD fires on the Frigate doing some more damage. It now has a lot of fires burning across its front, but it is still intact.
The Mon Cal now moves to bring its broadside into range and opens up with devistating effects. Explosions rock the outer hull of the ISD. One Nebulon B moves in close to the dogfighting fighters and takes out a couple, and fires its heavy guns at the ISD doing a little more damage. The second Nebulon B moves in closer to the ISD firing and doing even more damage.
Turn 5
The ISD is trying to recover its shields as its guns come back on line to bring fire on the Mon Cal cruiser, but a lot happens before it can open up!
The original battle goes even worse for the Rebellion. The Assault Frigate takes more damage from the Carrack cruisers, and the last of the X-Wings are blown from the sky in their dogfight with a squadron of TIE interceptors and TIEs. Y-Wings race to hit the Carracks but can't get past their shields.
 |
| Good overview of he battle at this point |
On the new front things go even worse for the Empire. In a continued dogfight, more TIEs and TIE interceptors go down as well as one Tie Bomber. A few A-Wings are destroyed as well as a couple of X-Wings. However, the Mon Cal now fires another barrage at the ISD blowing away its recovered shields and tearing up its side. The two Nebulon Bs also fire. The side of the ISD is devistated, and some of its internal structure is damaged. Its guns go offline from the damage before it can fire at the Mon Cal. However, on its other side it launches another small barrage at the Assault Frigate doing even more damage. The Assault Frigate is in trouble now!
Turn 6
This is the final turn.
Dog fighting goes on between fighters and the TIEs and Interceptors are fading fast! Only 1 more A wing goes down!
 |
| Final layout. The Assault Frigate is running like mad in the distance! |
The Mon Cal and the two Nebulon Bs continue to fire at the gaping wound of the ISD, and they manage to take out its engines and its hyperdrive. Explosions are rocking the ship now, and it is dead in space. The commander knows that all is lost and he sends a message to the Rebellion asking to allow them to surrender.
The Rebel commander agrees. The two Carracks know that all is lost, and they jump out of the area. The fighters disengage and stand down.
Aftermath.
Hundreds of Imperial crewmen have died in the explosions, but the Rebel commanders allows the others to launch in escape pods or shuttles. Hundreds are taken prisoner. After they evacuate, the Rebels fire on the ship destroying it.
The rebels made a bit of a mistake with launching too small of a force at the beginning. This cost them all of the fighters and almost lost the Assault Cruiser. However, the fact that the ISD had unloaded with half of its guns helped the Mon Cal cruiser a lot, because a full broadside would have been devistating. As it was the Mon Cal got to fire all of its guns and only received fire from half of the ISD guns.


