Thursday, November 5, 2015

Battlesystem Castle attack!

I haven't posted anything in a while.  Working 2 jobs causes you to loose a lot of playing time.

I have had some chances to play the new Star Wars Armada game, which was fun, but I don't have any pictures or reports.  (I lost badly, so a report isn't too much fun!)

The Battle

Forces of Good


The leaders are inside, not on the roof!
Lord Gorfus  AD 10/6*,  AR 4, Hits 3, Morale bonus +1
Mage Sandara - AD 4/4*, AR 8, Hits 1, Spell Points 8,  Magic Mis. 1 pt, Fireball 3 pt,
Father Tannor - AD6, AR5, Hits 2,  Spell Points 9,  Bless 1pt, Chant 2pt, Heal 1pt

Heavy Infantry - AD 6/8/6*, AR 5, Hits 1, ML 12
Heavy Archers - AD 6/6*, AR 6, Hits 1, ML 12
All of our defenders


Main Body of the orc army

Forces of Evil

Grog - AD10, AR 4, Hits 3  Morale bonus +1
Shaman - AD4, AR 9, Hits 2  Spell Points 5, Battle Rage(increase AD +1 for 2 turns) 2 pts, Courage(Increase Morale +2 for 1 round) 1 Pt

Light Orcs  AD 6, AR 9, Hits 1, ML 10 - Irregular only.
Med Orcs AD6, AR 7, Hits 1, ML 11
Orc Archers  AD 6/6*, AR 9, HIts 1, ML 10
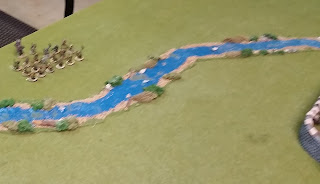
Western Attack Company
Ogres  AD 8, AR 7, Hits 2, ML 11


Army banner adds +1 to ML
Southeastern attack group - Medium orcs
Army Musician - Doubles Grog's command distance.
*= ranged weapon

Situation
Orcs have recently crushed a relief column bringing troops to the castle, so the defenders are greatly outnumbered. A couple of orc unit have come around from the south to stop the defenders from escaping.

The main body is coming in from the north.  They have 1 catapult and 1 ballista to aid in the attack.

Round 1

Western group crossing river
The evil side moves first.  All of the orcs advance, but are out of bow range.

 The catapult loads with small rocks and hurtles them at the tower.  They completely miss.
The good side has no targets as they are all out of range.

Main force advances
 
The defenders on the western wall looking for targets!


Round 2


First blood of the battle, and the start of a bad day for this unit!
These guys would hold their position for the rest of the night!
Evil moves again.  The catapult reloads
Good moves next.  The orc band to the west is now in long range.  The defenders fire and manage to get two hits, and one is a kill.  First blood is drawn!  The archers on the main tower fire at the orc archers and one of them also falls!


Round 3

One archer down!
Evil moves first again!  The orcs continue to advance.  Now the ballista fires.  It scores a hit, but the walls of the tower saves the defending archer.  The catapult fires again, and this time some of the rocks strike.  One archer falls to the blow.  The advancing orcs unleash a battle cry!
When the good side activates, they find a lot of targets in their range.  The archers on the tower fire again, and the lightly armored orc archers have two more fall!
A particularly bad round of fire for these guys!
To the west a round of extremely good dice rolls kill 4 more orcs.  Amazingly they manage to make their morale check!


Attack the tower!
Round 4

This time good activates first.  On the west they fire on the orcs once more, and 3 more fall.  They make another morale test.  This time they fail miserably, and find themselves fleeing in complete disorder across the river.  The archers on the tower manage to miss every shot!

They are getting closer!
When the evil side activates they continue to swarm forward.  The ogres are now moving past the archers and crossing the stream.  All of the orcs are now making their way across the river.
The broken unit to the west can't rally, and continues to flee.  One more failed rally will see them disperse!  The archers fire, but all miss.  The ballista fires but it too misses.  The catapult is reloading.
The defenders are now getting very nervous!


Round 5

The attackers view!
NE group crosses river.
Good activates first again.  The archers on the towers fire at the ogres as they cross the river.  They get three hits, but the ogres simply shake them off.  However the wizard fires a magic missile at the ogres and manages to actually kill one!  They make a morale test but succeed.  On the east side of the castle, several archers now can fire at the orc unit coming out of the stream.  They get two hits and both kill.  They make a morale check and succeed.
Getting across the river
The defenders on the west now turn to face the orcs crossing the stream to the northwest.  They fire and kill one orc.  The orcs easily pass their morale test to keep moving.

These guys rally, but are still shaken
When the evil activates the orcs are crossing the river as quickly as possible.  The orgres cross and move rapidly towards the gates.  The orc archers continue to blast arrows, and by sheer blind luck, they actually strike a defending archer and the man falls dead!  The orcs to the west of the castle manage to rally, and are now shaken, but not fleeing.


Round 6

Evil activates first.  The ogres rush the gate and start bashing at it.  They do 4 points of damage, so the gate has 6 left!  The defenders are now worried that the gate would soon fall!  All of the orcs are now across the river and preparing to rush the walls.  The orc archers continue to fire, but all of their arrows go too far or bounce harmlessly off of the walls.  The unit to the west tries to rally again, but can't, so they stand still.
The most devastating moment came when the catapult fired again.  This time it's rocks struck down with deadly effect.  Two of the archers fell, leaving only one left on the tower!

When the good forces activate, the last archer on the wall fires as quickly as he can at the ogres below.  He gets off two arrows, and both hit home!  One ogre falls!  The wizard fires yet another magic bolt, and gets a hit, but only wounds one.

With the gate shuddering Lord Gorfus decides to move some soldiers to the courtyard to defend the gate.  They also shift the others around.

The soldiers on the west wall fire again at the orcs who are getting close to the walls.  They land 6 solid hits, but the lightly armored orcs manage to deflect all but one arrow, so only one kill.  That was a heartbreaking moment for the defenders.


This report will resume this weekend when the battle comes to an exciting conclusion!

Friday, January 2, 2015

Star Wars Campaign - Part 1

Campaign, Game 1

To start with, I decided that the Imperials had an intelligence of 10.  They used 2 at each of their 4 main star systems to defend against any intelligence attacks there.  They then used 2 to try to influence the Enet star system which is having major problems with the Imperial presence and is on the verge of rioting.

The Rebels have 12 intel +1 because of the disgruntled people on Enet being very sympathetic to the Rebellion.  They use 2 on each of the 3 minor bases and 4 on the main base to defend against Imperial spys trying to find them.  They then use 3 on the Imperials to find out any trade convoys that might be ripe for striking.

The base roll is 40% and under, plus 5% for each point of intel -5% for each point of enemy intel used against them.

For the influence roll for the Empire there is no opposing intel, so they need a 50% to improve relations.  They roll 41 and the relations improve by one, but is still low.
The Rebels try to make an Intel test for enemy convoys and need a 40.  They roll 60 so fail.  They will sit quietly this turn.

Campaign Round 2.

Imperials continue to influence Enet, but this time roll a 83 and fail, so the relations drop by 1.  The Empire puts more stormtroopers on the ground to keep order.

Rebels try once more to find a convoy.  They roll a 01, what I consider a critical result.  They find out about a convoy carrying weapons and new officers to Enet.  They also find that there are 2 Corvettes escorting the convoy, and one of them has a crew that is very discontent with the cruel leader of the ship.  They may be keen to turn to the Rebellion if the ship can be captured.  The Rebel leaders decide to launch an attack on the convoy.  They want to capture the Corvette if they can, and capture the Freighters if possible.  If not destroy them.  They also want to destroy the shuttle carrying the officers, because that will improve relationships with the people of Enet.

Campaign Round 3 – Battle.

The Rebels find where the convoy will warp in, and they have enough time to attack before any reinforcements can arrive from the planet.  


Sorry that some of these pictures are badly out of focus

Turn 1.

Imperial Convoy
Rebels warp in and are moving at a speed of 4.  Convoy moves with a speed of 3.
When the convoy detects the rebels they begin to accelerate, but can only increase their speed by 1.  One of the corvettes break formation to intercept the fighters.  Both fire on the rebel ships, but the range is long enough that no shots hit. 
The rebels are out of range to fire back.


Rebel Attackers

Turn 2

Rebel fighters scramble towards the first corvette who is moving towards them.  (this is the one with the sympathetic crew).  The corvette with the convoy fires at the approaching Y-Wings, but rolls badly.  1 shot hits but only does minor damage.  The Y-Wing’s shields are pretty strong!  The other corvette opens fire and manages to get a solid shot on one x-wing, and it is blown away!  The fighters fire back, but the range is long, and only 1 fighter hits.  The shields are weakened, but are restored later.

Turn 3

Bye-bye Imperials!
The shuttle breaks formation and accelerates to try and get away.  The faster x-wings move in chase.  The 4 x-wings fire on the shuttle at long range.  2 get a solid hit, and the shuttle is blown away!  2 Y-wings move after the freighters and fire on them with their Ion guns.  They force the power out on the rear thruster for 4 turns.

The first corvette fires on nearby Y-Wings and hit one, but does little damage.  


The other one sees the approaching assault shuttles and targets one of them and hits.  It takes heavy damage but holds up.


The remaining ships fire on the corvettes and do only minor damage, but the shields are heavily weakened on both corvettes.

Turn 4

The corvettes both regenerate shields.  The second corvette is still weak, but the first is back to full strength.

The Y-Wings following the freighter once more opens up with their Ion guns and managed to knock out the main engine for 4 turns.  It can’t accelerate now!


The ships following the first Corvette fire at it.  They weaken the shields, and then the 2 y-wings open up with their ion guns and get a lucky blow in and hit the shield generator shutting it down for 4 rounds!  The corvette returns fire, but in a series of colossally bad rolls get no hits!  (rolled 17, 19, and 20!  Needed 14 or less!)

The other fighters targeted the other corvette and blasted through it’s shields doing some damage to the rear thrusters.  It returns fire hitting a y-wing but only doing minor damage.


Turn 5

The second corvette regenerates 12 shields and give 6 to the side and to the rear.  It doesn’t help much.  The x-wing hits the corvette and takes out its rear shield and hitting the hyperdrive damaging it.  The Y-wings do some structural damage.  Their ion guns miss, so no systems go offline.  The corvette fires at the y-wings,  and hits one, but still is rolling badly and doesn’t even penetrate the shields. 

Boarding the corvette
One assault shuttle boards the damaged freighter and instantly takes over because there are no defending marines.  Two shuttles board the first corvette.  The defenders make a half hearted attempt to fight back, but are quickly overwhelmed.  (boarders roll 1d10 and on a roll of 5 or less take out the defenders.  I gave a bonus of 1 because of the low morale, so they needed a 6.  They rolled a 4.  The defenders then got to fight back, but rolled a 7, so no losses to the attackers)  The corvette surrendered to the Rebels.


Assault shuttle takes freighter


The Fighters that had attacked the shuttle speeded after the other freighter.  They decided it was too close to getting away for them to capture it and wanted to destroy it.


Turn 6

 Corvette 2 powers the rear shields back to 12.  It doesn’t help much though because the attacking fighters move in and blow through the shields and do some more structural damage.  The corvette fires back at the Y-Wings managing to land two solid blows on the same ship, and the fighter disappeared in a ball of fire!


The fighters close in on the last freighter firing and doing some heavy damage, but not slowing it. 


Turn 7

The corvette once more repowers the shields and begins to accelerate away knowing that this fight is lost!  The Y-wings and x-wings pursue and continue to pound it.  One of the Y-Wings lands a proton torpedo on the shield generator and destroy it!  More fires explode as it continues to take a pounding.  It fires back, this time doing much better.  2 hits on 2 y-wings.  One takes moderate damage, while another is destroyed!  They also hit the other x-wing doing some damage.


The Freighter races to the very edge of the board and safety, but the x-wings and y-wings are too close.  They let loose with everything, and between a bund of laser hits and torpedo hits the structure is breached and explosions rock the ship, finally causing a massive explosion that destroys the whole thing!


Turn 8

The corvette is limping and on fire, but still accelerates.  It is too late though.  With no shields, the remaining Y-wings and X-wing fire their guns and torpedoes.  They finish wiping out the body of the ship and it breaks apart exploding as it does.

Conclusion

This fight never could have been won by the Imperials because it was meant to be unbalanced.  Their only victory could have been to cause heavy casualties.  If they could have taken out half of the fighters or shuttles, the rebels would have withdrawn and they would have a major victory.  If they could have gotten half of the ships off of the table it would have been a minor victory.  As it was, the rebels made a major victory.  They captured a new corvette with some crew members willing to defect, and a freighter filled with military weapons, and they destroyed all of the other vessels.  The thing that decided this fight was the horrible dice rolling by the Imperials!