I have recently picked up a set of the old rules Bablyon 5 Wars, and have found some stats for Star Wars (and others) at this website Babylon 5 Wars Vault. With those in hand I wanted to start playing the game.
At first I did a few test runs with some stock ships from the Babylon 5 Wars boxed set. I then decided that the only way that I would get going with this is to give it a try and see what I didn't know.
For my test I used 1 Victory II Star Destroyer against 1 Mon Cal MC80. The Empire had 8 flights of 3 tie fighters. The Rebels had 4 flights of 2 x-wings. I didn't have a Mon Cal fig, so I used a stand in to represent it.
The Alliance ships entered the board moving at a speed of 5.
The Empire also entered at a speed of 5.
During the first turn both fleets moved forward. The x-wings started to move away from the MC80, but not too far. 2 flights of ties started forward to intercept the x-wings. The two ships fired a couple of long range shots with two of their twin turbo lasers. Surprisingly all of the shots hit, weakening the shields on both ships.
During the second turns the ships closed in and opened up with all of their frontal guns and some of their forward facing side guns. Both ships lost most of their forward shield, but they held. The fighters all closed on each other and exchanged some long range fire. One of the x-wings was damaged.
The third turn was a devastating turn for the Imperials. Both ships had maneuvered to face the side shots. The Mon Cal had 9 twin turbolaser batteries to fire and 8 of them hit smashing through the shields of the Victory, and knocking out some of the Victory's guns, and almost all of its hull, and some even penetrated to the main body of the ship. The Mon Cal lost it's shields but had only minor damage. 2 flights of X-wings fired their torpedoes at the Victory, and finished off it's side. (The torpedoes are not that powerful, but with the shields out, and the hull severely damaged, it didn't take a lot.) Some of the x-wings and Ties squared off. Several x-wings were damaged but none were destroyed. The flight of ties on the right of the picture lost two ships to the x-wings.
The fourth turn brought the game to an end. Both ships turned to bring their other side into the fight. The Victory managed to knock out the Mon Cal's shields and do minor damage, but the devastating broadside of the Mon Cal tore through the shields of the Victory and destroyed the left side. Two flights of x-wings managed to circle around the Victory to fire their torpedoes at the side that had already been destroyed. With nothing to stop them, they penetrated into the heart of the ship, and did enough damage to break it apart. On the other side of the board, the ties circled around the Mon Cal to the side that had been damaged in the last turn and unleashed a barrage of fire on it, but their guns were so weak that they only inflicted minor damage. They did manage to knock out the single flight of x-wings which was defending the Mon Cal. In the center right of the map, the flight of x-wings finished off the flight of ties that it had been fighting. The ties which had been defending the Victory did some damage to the x-wings there but none were destroyed.
After the Victory was destroyed, the ties had no place to run to, so they surrendered. (they couldn't really hurt the Mon Cal because their guns were too weak)
Conclusion: The rules play pretty easily, but the weapons of the ships are tremendous. Individually they may not be overwhelming, but in a volley they can almost destroy a ship in a single turn! The downside is that you then have to wait a couple of turns to fire again. The shield regeneration was enough to handle one weapon (and to make sure that the ties couldn't do much damage), but that was it. I didn't use the Ion guns because I am still not quite sure about how they work. I also didn't use the critical hit system because I am just starting to learn the other items. Fighters hitting fighters was rather difficult. I may need to look into that system again.
Tuesday, December 28, 2010
Tuesday, October 19, 2010
10mm WWII Skirmish
I have been buying 10mm WWII figs for mass battles, and have mostly been buying Minifigs stuff, but then I bought a couple of packs of Wargames South figs, and these figs are somewhat bigger and broader than the Minifigs troops, so I thought that they wouldn't look too good on the bases that I use for WWII.
Still, the figs were pretty good, and I wanted to use them, so I decided to use them for skirmish battles. I like to use Arc of Fire for skirmish battles, and I thought these figs would work pretty well, and I could still use my Minifigs vehicles with them.
Here are some pictures of some of the figs. They are mounted on 10mm thin round bases from Litko
American soldiers
German Troops
Japanese Troops
Monday, October 18, 2010
15mm Orcs from Khurasan Miniatures
I bought some of the new 15mm orcs from Khurasan a couple of months ago and just now got around to painting them.
I really like these a lot. They have a great Tolkien like feeling to them. I am looking forward to the line expanding.
This first picture shows how well these are sculpted. They have a lot of detail and are quite easy to paint. The only complaint that I have is that a couple of the poses are a little odd. The spearman that is the 3rd from the lef is holding his spear near the end of the spear, which would be somewhat awkward because the weight of the spear would all be on the other end. Still they are great figs!
This last shot shows how they match with other manufacturers. The figs in the pic are Khurasan, Grenadier (Mirliton), Demonworld, Black Raven Foundry Great Orc, BRF lesser orc archer, Eureka .
Saturday, October 2, 2010
Pictures from Hurricon 2010
I have been rather slow with posting lately, but I will be doing some catch up this week.
For starters, last weekend was HMGS - South's Hurricon convention, and I was able to go for a couple of days, and it was a good convention. There was a wide variety of games, and people had fun. I took several pictures, but a lot of them were not too good because of the poor lighting.
Here are some of the better ones.
On Friday I played in an ACW game using Fire and Fury. It was playing out the first battle of Bull Run (Manassas). This was a two session game, and I joined in the second session. I took over the confederate right flank.
My starting positions.
We had to hold this hill.
A better shot of my units. We were getting pounded pretty badly!
After a few turns I had some reinforcements arrive. In this picture, they are marching in at the left.
This is the left of our line. There are already a lot of Yankees moving towards the hill, but we are holding.
The far right of my line breaks and falls back persued by Union troops. My new unit (in the center of the picture) quickly comes under assault.
On the hill, the unit that was holding the center broke and fell back. They can be seen in the woods at the left of the picture. With that the Union troops quickly rolled onto the hill, and we lost.
On Saturday morning I played in a large WWII battle using Rapid Fire. I tried to take pics, but none came out.
On Sat Afternoon I played a Boxer Rebellion game using the Sword And Flame rules. I controlled a unit of British infantry, and I had to defend some civilians as they loaded a train to get out of the area. We succeeded!
Here are some other pics that I took from around the area.
For starters, last weekend was HMGS - South's Hurricon convention, and I was able to go for a couple of days, and it was a good convention. There was a wide variety of games, and people had fun. I took several pictures, but a lot of them were not too good because of the poor lighting.
Here are some of the better ones.
On Friday I played in an ACW game using Fire and Fury. It was playing out the first battle of Bull Run (Manassas). This was a two session game, and I joined in the second session. I took over the confederate right flank.
My starting positions.
We had to hold this hill.
A better shot of my units. We were getting pounded pretty badly!
After a few turns I had some reinforcements arrive. In this picture, they are marching in at the left.
This is the left of our line. There are already a lot of Yankees moving towards the hill, but we are holding.
The far right of my line breaks and falls back persued by Union troops. My new unit (in the center of the picture) quickly comes under assault.
On the hill, the unit that was holding the center broke and fell back. They can be seen in the woods at the left of the picture. With that the Union troops quickly rolled onto the hill, and we lost.
On Saturday morning I played in a large WWII battle using Rapid Fire. I tried to take pics, but none came out.
On Sat Afternoon I played a Boxer Rebellion game using the Sword And Flame rules. I controlled a unit of British infantry, and I had to defend some civilians as they loaded a train to get out of the area. We succeeded!
This is the layout at the beginning of the battle. The rail station is to the left.
My troops are the guys in tan. At the top are the French, who refused to help my troops out.
After a couple of turns the train was loaded and moving, so we prepared to move out.
These were the guys who caused me problems. The canon on the tower caused some casualties and damaged the train. I was happy to be free of these guys!
This is why we had to run. There was a horde of Boxers attacking the rail station.
This gunboat is our escape.
Some junks showed up to stop the gunship.
My troops were moving towards the river, but were pretty beat up. Still we were able to smash a Boxer unit at the temple. A few turns before, they had smashed the French unit (serves them right for not helping me!)
Two American units captured the dock and held it for the train to reach the boat.
The gunboat dropped off some sailors to lend a hand, then turned to face the junks. A couple of turns later, the junks had earned their name.
I thought these guys looked cool. They remind me of Tigger pajamas!
Here are some other pics that I took from around the area.
A chariot game. Looks like it was a lot of fun!
This Hoth game was huge! They had 3 eight foot long tables.
Pig Wars game. There is nothing as fun as pillage and plunder!
American Revolution in the southern colonies. Here you can see some Colonial cavalry being repulsed by the British.
A larger view of the battle.
A Sword and Flame battle in North Africa.Monday, August 23, 2010
Battle Report Using Battlelust Wargame Rules
Battlelust is a set of rules produced by Columbia Games. They are designed to do early medieval type battles, and were created to go with their RPG Harnmaster. Columbia Games Website
I have decided to do a small battle with these rules to give them a try. In the game the rules are based around squads of 5 men. I have tinkered with the squads a little for my game.
My game is set in Middle Earth, with a patrol of Gondorian soldiers defending against an orc raid.
Gondor Troops
1 Commander - Armor 3
1 Standard Bearer – Armor 2
10 Heavy Infantry – Armor 2
5 Heavy Arcers – Armor 2
Orc Warband
1 Leader – Armor 3
1 Musician – Armor 2
3 Sergeants – Armor 2
1 squad of 7 orc light swords – Armor 1
1 squad of 7 orc light spear – Armor 0
1 Squad of 10 orc light spear – Armor 0
Report
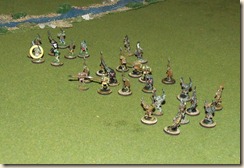
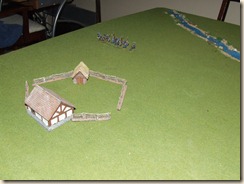
The battle began with both sides marching in. The Gondorian patrol needed to try to protect a small farm on their side of the board. They quickly saw the approaching warband and decided to deploy where they were so that their archers could start opening fire at long range.
 Men Entering

Initial Deployment
Round 1
Humans deploy and orcs advance.
Round 2
Round 3
Orcs continue to advance, and the human archers manage to kill one.
Round 4
Orcs continue to advance. Humans fire, but either miss or are blocked by shields.
Round 5
Orcs move closer. The human archers unleash a deadly hail at the orc swordsmen. 1 falls and another is badly wounded forcing a moral check. They succeed with a critical success, and instead run even closer.

Round 6
The human archers fire on the orc swordsmen again and another one is killed (the wounded one). Another moral check and another crit success! They charge into melee before the human infantry could form a shieldwall. Fortunately their attacks are ineffective.
Round 7
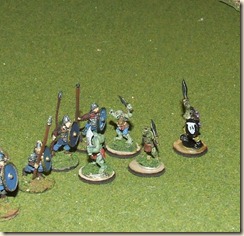
The human archers turn their attention to the larger orc spear unit in the center. They have some great shots killing 2 and wounding a third. The right side of the human line forms into a shield wall, while the others engage the orc swordsmen. They don’t kill any, but one man is lightly wounded in the melee.
The large orc spear unit continue to advance in the center, while the other unit cuts through the farm to try to attack the flank.
Round 8
The human archers fired at short range into the oncoming spear unit killing 1. The orc sword unit continues to engage the men wounding 2, and the men are unable to kill any of the orcs. The orcs in the center try to charge but fail their command roll and just move a little closer. The orcs on the right move through the farm to line up for a charge.
Round 9
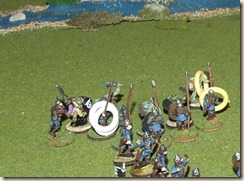 The human commander sees that the men on the left are having some problems with the small band of orc swordsmen and charges in, but doesn’t help any. However, the men are encouraged by his aid and kill one of the orcs. The others are frightened and fall back to regroup.The orcs in the center try to charge again and fail. They move forward a little. The human archers continue to fire at short range, but this time the orcs manage to evade all of their shots. The orcs at the farm are now ready to charge. The humans are getting nervous now!
Round 10
The human archers fire at close range and kill 3 orcs forcing a moral check which they pass. Now both orc spear units try to charge, and both fail! The center unit is close enough that they can engage without the charge, and they do. Also, the orc leader charges in to the fight. The orcs quickly find that they can’t break the shieldwall, and 1 is killed in the attack. However, the other orcs in that unit are now thoroughly fired up and go berserk no longer having to make moral tests.
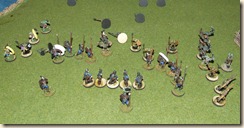
Round 11
Now everyone gets into the fight. Some of the archers are able to fire at the orc leader at point blank, but his heavier armor protects him. The orc sword unit reengages killing 1 soldier. The others engage wounding a couple of men, but they hold and another orc falls.
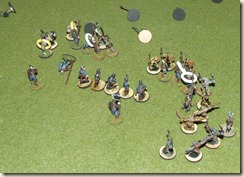
Round 12
The captain of Gondor attacks again, but stumbles and completely misses his foe! Other orcs are wounded, and the human standard bearer impales one orc with his banner! The fight starts to turn though as more men are wounded and 2 fall.
Round 13
This proves to be the critical round.
The captain of Gondor attacks, but is still stumbling about, and exposes himself to an easy shot from his enemy. Fortunately his heavy armor stops most of the blow and he is only slightly wounded. In a flurry of fighting 2 men fall and another 4 orcs. The lines for the men are waivering, but the orcs are quickly loosing their numbers.
Round 14
This round breaks the fight.
The Gondorian captain is still ineffective, but his attacks open the enemy up for one of his troops to come in to finish his foe off. The orc leader is wounded, and in a flurry of savage fighting, the superior skills and armor of the Gondorian troops finally pay off as they cut down 4 of the smaller spear unit, and another couple of beserkers.
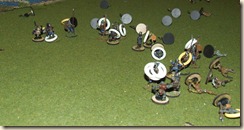
The orcs can not bring down a single man, and now their moral breaks. The handful that are left turn and flee.
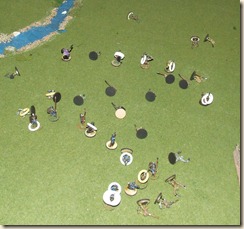
Many of the men are down, and most of those that are left are injured, so they decide not to pursue.
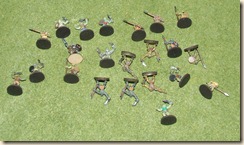 Orc Casualties
 Human Casualties
Conclusion
The game played pretty quickly. I liked the rules for Tactical Advantages - If an attack roll is bad, and the defense is good, then the defender gets a chance to strike back. The orcs took casualties quickly because of their poor armor (or no armor). However, if both units were armored, this game would bog down quickly with a lot of damage being absorbed by the armor.
The armor ratings - GAC (General Armor Class) are as follows;
GAC 0 = Unarmored.
GAC 1 = Leather or quilted armor.
GAC 2 = Chain shirt.
GAC 3 = Full chain, scale etc.
GAC 4 = Plate armor.
Combat is resloved by making an attack roll opposed by a defense roll on a d100. If you roll under your skill you succeed. Over is a failure. For any event a roll that ends in 0 or 5 is a critical. Most of the time you will get a normal success vs a normal failure. In that case usually will roll a d6 and add your weapon's impact. If you get a critical one way or the other you may add a die or two. To get an outright kill on a GAC 0, you need at least a total of 13. So for instance if you have a sword with an impact of 6, and you get a normal success, and they get a normal failure, you roll a d6 (say you get a 6) and add to your impact of 6, you get a total of 12, which is a major wound - but not a kill. If you are GAC 2, that is only a minor wound, and for GAC 3 or 4 it doesn't even hurt!
What does happen is that as you get a wound, you have to roll a number of D6s against your Physical stat (around 10). If you fail, then you pass out and are out of combat. A light wound is 1d6, serious is 2d6 and grevious is 3d6. The effects are cumulative, so if you get 3 light wounds (which is common if you have armor) you end up having to roll a 3d6 test, so you often end up being worn down. One way to speed things up is to mak a Grevious Wound an automatic failure.
The game plays pretty well as it is, but it will not work for later medieval battles very well. Still, it was very easy and played quick. You need something to keep track of injuries.
I have decided to do a small battle with these rules to give them a try. In the game the rules are based around squads of 5 men. I have tinkered with the squads a little for my game.
My game is set in Middle Earth, with a patrol of Gondorian soldiers defending against an orc raid.
Gondor Troops
1 Commander - Armor 3
1 Standard Bearer – Armor 2
10 Heavy Infantry – Armor 2
5 Heavy Arcers – Armor 2
Orc Warband
1 Leader – Armor 3
1 Musician – Armor 2
3 Sergeants – Armor 2
1 squad of 7 orc light swords – Armor 1
1 squad of 7 orc light spear – Armor 0
1 Squad of 10 orc light spear – Armor 0
Report
The battle began with both sides marching in. The Gondorian patrol needed to try to protect a small farm on their side of the board. They quickly saw the approaching warband and decided to deploy where they were so that their archers could start opening fire at long range.
 Men Entering
Initial Deployment
Round 1
Humans deploy and orcs advance.
Round 2
Round 3
Orcs continue to advance, and the human archers manage to kill one.
Round 4
Orcs continue to advance. Humans fire, but either miss or are blocked by shields.
Round 5
Orcs move closer. The human archers unleash a deadly hail at the orc swordsmen. 1 falls and another is badly wounded forcing a moral check. They succeed with a critical success, and instead run even closer.

Round 6
The human archers fire on the orc swordsmen again and another one is killed (the wounded one). Another moral check and another crit success! They charge into melee before the human infantry could form a shieldwall. Fortunately their attacks are ineffective.

Round 7
The human archers turn their attention to the larger orc spear unit in the center. They have some great shots killing 2 and wounding a third. The right side of the human line forms into a shield wall, while the others engage the orc swordsmen. They don’t kill any, but one man is lightly wounded in the melee.
The large orc spear unit continue to advance in the center, while the other unit cuts through the farm to try to attack the flank.
Round 8
The human archers fired at short range into the oncoming spear unit killing 1. The orc sword unit continues to engage the men wounding 2, and the men are unable to kill any of the orcs. The orcs in the center try to charge but fail their command roll and just move a little closer. The orcs on the right move through the farm to line up for a charge.
Round 9
 The human commander sees that the men on the left are having some problems with the small band of orc swordsmen and charges in, but doesn’t help any. However, the men are encouraged by his aid and kill one of the orcs. The others are frightened and fall back to regroup.
Round 10
The human archers fire at close range and kill 3 orcs forcing a moral check which they pass. Now both orc spear units try to charge, and both fail! The center unit is close enough that they can engage without the charge, and they do. Also, the orc leader charges in to the fight. The orcs quickly find that they can’t break the shieldwall, and 1 is killed in the attack. However, the other orcs in that unit are now thoroughly fired up and go berserk no longer having to make moral tests.

Round 11
Now everyone gets into the fight. Some of the archers are able to fire at the orc leader at point blank, but his heavier armor protects him. The orc sword unit reengages killing 1 soldier. The others engage wounding a couple of men, but they hold and another orc falls.

Round 12
The captain of Gondor attacks again, but stumbles and completely misses his foe! Other orcs are wounded, and the human standard bearer impales one orc with his banner! The fight starts to turn though as more men are wounded and 2 fall.
Round 13
This proves to be the critical round.
The captain of Gondor attacks, but is still stumbling about, and exposes himself to an easy shot from his enemy. Fortunately his heavy armor stops most of the blow and he is only slightly wounded. In a flurry of fighting 2 men fall and another 4 orcs. The lines for the men are waivering, but the orcs are quickly loosing their numbers.
Round 14
This round breaks the fight.
The Gondorian captain is still ineffective, but his attacks open the enemy up for one of his troops to come in to finish his foe off. The orc leader is wounded, and in a flurry of savage fighting, the superior skills and armor of the Gondorian troops finally pay off as they cut down 4 of the smaller spear unit, and another couple of beserkers.

The orcs can not bring down a single man, and now their moral breaks. The handful that are left turn and flee.

Many of the men are down, and most of those that are left are injured, so they decide not to pursue.
 Orc Casualties
 Human Casualties
Conclusion
The game played pretty quickly. I liked the rules for Tactical Advantages - If an attack roll is bad, and the defense is good, then the defender gets a chance to strike back. The orcs took casualties quickly because of their poor armor (or no armor). However, if both units were armored, this game would bog down quickly with a lot of damage being absorbed by the armor.
The armor ratings - GAC (General Armor Class) are as follows;
GAC 0 = Unarmored.
GAC 1 = Leather or quilted armor.
GAC 2 = Chain shirt.
GAC 3 = Full chain, scale etc.
GAC 4 = Plate armor.
Combat is resloved by making an attack roll opposed by a defense roll on a d100. If you roll under your skill you succeed. Over is a failure. For any event a roll that ends in 0 or 5 is a critical. Most of the time you will get a normal success vs a normal failure. In that case usually will roll a d6 and add your weapon's impact. If you get a critical one way or the other you may add a die or two. To get an outright kill on a GAC 0, you need at least a total of 13. So for instance if you have a sword with an impact of 6, and you get a normal success, and they get a normal failure, you roll a d6 (say you get a 6) and add to your impact of 6, you get a total of 12, which is a major wound - but not a kill. If you are GAC 2, that is only a minor wound, and for GAC 3 or 4 it doesn't even hurt!
What does happen is that as you get a wound, you have to roll a number of D6s against your Physical stat (around 10). If you fail, then you pass out and are out of combat. A light wound is 1d6, serious is 2d6 and grevious is 3d6. The effects are cumulative, so if you get 3 light wounds (which is common if you have armor) you end up having to roll a 3d6 test, so you often end up being worn down. One way to speed things up is to mak a Grevious Wound an automatic failure.
The game plays pretty well as it is, but it will not work for later medieval battles very well. Still, it was very easy and played quick. You need something to keep track of injuries.
Tuesday, June 8, 2010
First foray into 15mm Sci Fi
I guess that I have decided that I didn't have enough addictions yet, so I had to expand. I am a big fan of Stargate, so I had to buy some of the "not Stargate" miniatures produced by Ground Zero Games. I ordered some Jaffa and the SG team.
The figs are excellent castings with very little flash and a great deal of detail.
Here are my first painted figs.

O'neal Daniel Jackson

Carter
Teal'c
Jaffa
The figs are excellent castings with very little flash and a great deal of detail.
Here are my first painted figs.

O'neal Daniel Jackson

Carter
Teal'c
Jaffa
Subscribe to:
Posts (Atom)


