Monday, November 2, 2009

Bloodbath in the wilderness (WHAA)

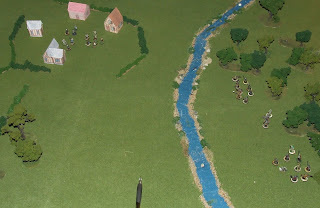
This is the largest battle that I have yet done with Warrior Heroes Armies and Adventure. This is to test a mid sized battle to see how well the rules handle it.

The scenario is this - Recently there has been a large number of orc raids along the border. So Lord Talin and a force of soldiers are dispatched to the fort at High Pass to help them hunt down the orcs. What he does not know is that the fort has fallen weeks ago, and now the orcs are moving south through the woods in order to attack some of the villages along the frontier. Even as he is marching one force of orcs has spotted them and is moving in to attack.

I will be adding some pictures to this report this weekend.


Turn 1
Humans activate first and move forward unaware of the enemy taking up position in the woods around them. The orcs slowly move forward.


Turn 2

The Orcs continue to take up position as the humans march forward totally unaware of the ambush.

Turn 3
The human riders riding out front notice some movement in the woods to their right. As they look, they catch a glimpse of orcs in the trees. The alarm is sounded and the humans turn to the right to meet the threat.

The orcs (who activated second in this turn) moved forward, and to the human's rear, orc archers emerged from the rear, and their deadly arrows fell one of the knights and 2 archers. At the same time the orc wolf riders emerged from the trees far to the human's right.


Turn 4

The orcs activated first and their archers dropped 2 of the human archers. The orcs to the front of the humans emerged from the trees. In the distance some of the main body of the orcs could be seen clearing the forest, and to many people's horror, the giant could be seen.

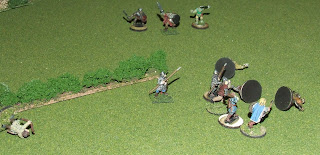
When the men activated, the archers took out two more orc archers and 1 of the wolf riders. The three riders charged the orcs who were emerging from the treeline. The assault was so fierce that they killed three orcs, but one of the riders went down by a freak attack.

Turn 5
Both sides rolled very high on their activation (6 for the men and 5 for the orcs). Only the main body of men and orcs activated. The human archers fired and killed another orc. The rest missed. The main body of orcs moved forward.

Turn 6
Another bad roll for the orcs (6) and only the main body moves forward. The men continue to fire at the advancing orcs, but once again only score a single kill. The riders continue to ride down orcs killing another two, and the others, now panicked fall back into the forest.

Turn 7
Again the orcs roll a 6, and only the main body moves. They are getting very close now! The human archers continue to fire, this time with a little more effect. Two orcs are cut down and one wolf rider. The human riders move to intercept the wolf riders, and Lord Talin and his knights move to intercept the oncoming giant.


Turn 8

The orcs roll a 5 for activation, and the humans roll a 1. The orcs move forward again after a few turns of indecision. The heavy orcs and the giant decide to move into contact. The human archers get off a quick shot as they come in, but only 1 orc falls to their arrows. A bloody melee follows, and the human's shields help out as 4 orcs fall and three men. Lord Talin and his knights charge the giant and there is a period of dodging back and forth as neither side can land a telling blow.

Turn 9
The humans go first with a 5, and the orcs follow with a 1. The human archers continue to fire, but once more miss a lot, only killing 1. The bloody melee continues with the humans regrouping their line and dishing out more damage to the orcs. 5 more fell at their feet, but three more men went down, and the men could not afford the losses. Lord Talin kept the giant confused and away from his infantry.

The riders struck into the flank of the wolf riders, but one did a quick and deadly wheel killing the warrior that attacked him, and only one wolf rider fell in the attack.

When the orcs moved they regrouped and continued their attack, and now all of the orcs were moving forward again. However, the human shields continued to give them the edge. In the melee 2 humans fell, but 2 orc warriors also fell. The heavy orcs were growing thin in numbers very quickly! Once more Lord Talin and his knight managed to avoid the giant's heavy attacks.


Turn 10
Humans roll 1 and orcs roll 4. The orcs attack first and everyone moves into the fight! The remaining orc archers open fire on the human archers and manage to bring two of them down. Then, the orc infantry sweep in. Two orcs manage to swarm Lord Talin's knight and bring him down, but amazingly the human infantry hold their line killing 3 orcs. The giant, upon seeing the last of Lord Talin's knights fall charge Talin, but Talin is quicker and manages to land a blow on the giant injuring him. Out in the open, the wolf riders wheel around to charge into the human riders, and kill two of them.

When the humans activate, the infantry fall back a little and regroup their lines. The archers open fire on the orc archers and the wolf riders, but only manage to take out one wolf rider. Lord Talin sees a chance to charge the commander of the heavy orc infantry, and rushes him, and in a dazzling melee, he kills the orc.

Turn 11
Humans roll a 1 and orcs a 2. All of the orcs charge again. The giant rushes Lord Talin who tries to dodge the rush, but only gets partially out of the way. He has been injured. The orc heavy infantry tries to regroup while the other orcs rush the humans. Two orcs fall in the attack, and no men. However, the wolf riders rush the exposed archers and kill two of them.

When the humans activate, the soldiers on the right flank move to push back the wolf riders attack. They kill one, and the others fall back. Lord Talin charges the giant once more, and this time manages to kill it. The humans cheer at seeing the giant go down.

Turn 12
Orcs roll 4 and humans roll a 5. The orcs charge, but the heavy orcs are out of commission as the orc leader regroups and takes charge of them himself. The regular orcs are not able to penetrate the human line, and are pushed back, but amazingly only one orc falls. However, on the left Lord Talin and his remaining knight are rushed by some orcs, and the knight falls, but Lord Talin manages to push his attackers back.

When the men activate, they fall back as far as possible. Lord Talin falls back with his troops and holds the far left flank.

Turn 13
Orcs roll 4 and humans roll 1. Now that all of the orcs are in position, they swarm forward. The heavy orcs rush the human's left flank, while the lighter orcs rush the rest of the line. The wolf riders rush the last of the archers who break and run. They are cut down by the persuing wolf riders. In the melee at the line 2 men are brought down, and two orcs fall, but on the far left flank, Lord Talin is swarmed by the majority of the heavy orcs, and can not fend them off. He is cut to pieces, and the men around him on seeing this, break and run. Nearly half of the remaining men are now fleeing for their lives.

When the humans activate, the two remaining captains regroup their force and push back the orcs killing two of them.

Turn 14
Humans activate with 3 and orcs a 1. The humans decide that they have to try to get out of there with whatever they can. They fall back at full speed.

When the orcs activate, the orc general is calling for blood, and the orcs charge managing to engage the humans. It is a bloody fight for the men, and 4 are killed, along with one of the captains. They kill 2 orcs and one of the wolf riders. Their only chance is to get out.


Turn 15

The humans desperately need to get initiative, but the orcs roll a 4 to the humans 2. This is the end of it. The orcs manage to surround the remaining humans. All but one captain are massacred, while only 2 orcs go down. The lone captain knows that he is finished, but will not go down without a fight. He takes one more orc down before they rip him apart.

Results
It was a bad day for the humans. The ones that fled the battlefield are eventually tracked down and killed in the forest. However, one manages to get all the way back to the fort to warn the others about what happened.

As I had the humans moving forward, I made them roll a test to see if they spotted the orcs. I said that they had to have three successes to see them. It was the third turn before they spotted the orcs.

I had planned on using the large battle combat rules for this fight, but the way it happened was that the orcs engaged the men in small groups instead of one massive push. I think that I will have to do an even bigger battle than this to use the large combat rules. That makes me happy because I know that the rules will handle fairly large fights. After I did this, I realized that I didn't really do the combat between Talin and the giant right, or it might have ended even sooner. Still, this was a lot of fun. Next I want to do a larger fight that will focus on a siege of a small castle. There aren't rules for a siege, so I will have to do some house rules.


Thursday, October 22, 2009

Building 15mm buildings

I haven't done any posts in a while, so I wanted to add my latest project.

I have been working on some buildings for 15mm wargames. These buildings are supposed to be wattle and daub type construction.

The first houses are under construction. They are made with balsa wood, and basswood strips glued on for the frames. I have been experimenting with different ways to do thatch roofs. This is spackling compound textured with a brush. We will see how it looks when painted.


These next buildings are similar. I found some basswood that was shaped like clapboard siding and thought that it would make acceptable shingles. For one of the houses I am using cork boards as stone foundation. It has a good texture, and I am hoping that it paints up well enough.


This last one is a partially painted building. It is the largest of the bunch and will represent a small inn. The extension is made with balsa and scored to look like wood planks. For some reason I can't get those fine details to show up in this picture. When I get finished I will set up a photo booth and see if I can get a better picture when I use better lighting.


I'm having fun with these and am very pleased with the results so far. I will post more info as they are finished!

Sunday, September 20, 2009

Looking for a new primer

I have used the GW primer for a long time, and it does a good job, but is super expensive, and now they are using a new spray nozzle which I have had problems with. I always have to buy black. Twice I have bought white, but it has never seemed to stick to the figures for me.

So, with all of that in mind, I have been looking for a new primer. I checked out comments over at The Miniatures Page and have decided to test a few products that people there use.

The Contenders
There are three types that I am trying. The first is Colorplace Gray Primer (Walmart Brand). I bought for $1.25. The second is Krylon Primer (I like the fact that they have multiple colors of primer). I bought this for $2.95. The final is ColorPlace Flat Black Paint, which costs $.95.

The Test

I then took all three choices and shook them up and sprayed some figs. I have to say that all three sprays went on easily with a nice smooth spray. All three went on with light coats that did not obscure the details. The Krylon went on the heaviest, and it might be enough to cause some detail loss on smaller scale figs. I tried it with some 10mm figs, and didn't notice any problems though.

Both of the ColorPlace sprays dried within minutes. The Krylon took about a half hour to dry adequately.

I then took the figures and rubbed them with my fingers. The ColorPlace Gray Primer had a little of the primer rub off after a little bit, but all held pretty well. The Krylon held the best, but the ColorPlace Flat black was right behind it with barely noticeable loss.

I then put on a quick coat of one color to see how well it stuck. The two ColorPlace paints took the paint very well. (I use Vallejo Paints). In this example, the Krylon also did very well, but when I painted some 15mm figs, there was just a small amount of beading to this primer which made painting on it a little more difficult.

Conclusion
All three primers did very well, and were at least as good as any GW primer that I have had. (if not better). The Krylon had the best adhesion, but was a little difficult to work with. I think that my choice will be the ColorPlace Flat Black paint. At $.97 for a can, the price can't be beat!

15mm Gear Krieg Figs

I have taken a slight break from my fantasy gaming to paint up some 15mm Gear Krieg figs that I have.


The first two pics are of some German rocket troops. I am pretty happy with how these came out. I don't have a good camera for close ups, so these aren't the best pics in the world.


You can also see the mat that I work on and how much paint I get all over the place :-)


Next I have some American Helo troops.


Overall, the figs are fairly well detailed. In each pack there are about three or 4 variants, but most are so similar that it is hard to see the difference. For both sets, all seem to be armed with SMGs. It would be nice to have a heavier weapon variant.

Friday, August 28, 2009

Defend the Village - Ares test game

I am playing the same scenario that I used with WHAA and Savage World Showdown, but this time I will be using the rules Ares by Majestic Twelve Games. Actually, I actually played it twice, but the first game I didn't take any pictures, and I messed up some of the rules. In that game, the orcs rushed the town, and on the right were beat up pretty bad by the archers, and then hurt even worse when the reached the hedge. On the left though, in the first round of melee, they took out Borom, and quickly rolled over the left and finished everyone else off. It started well for the humans, but turned into a bloodbath real fast.

Now, on to this matchup!
The Initial Setup.

The orcs were emerging from the woods, and Lord Borom was just entering the village


Round 1
Round 1 saw the orcs moving up to the river, and the humans rushing to take their positions along the hedge.

Round 2
The orc archers were now in position, and while the other orcs were fording the stream, they took a few pot shots at the quickly arriving humans. Amazingly, one arrow found its place and dropped one of the human warriors.

Round 3
The orc archers fire their rounds as their allies continue to advance, but this time they come up short. However, the human archers who are now at the hedge, open up on the orcs rushing at them. 1 orc falls to their arrows.


Round 4
The orcs on the right rushed the hedge, but the human archers opened up on them at point blank and 2 orcs fell. However, the orcs reached the hedge, and a bloody fight ensued. The orcs managed to drop one of the warriors and one of the archers.

Round 5
This round saw the fight fully engaged. At the opening, the orcs rushed, but no one fell. However back at the hedge, the fight continued. Gorg dropped a warrior and rushed over the wall, but the human archer fell one of his allies, and another was killed while rushing a warrior at the hedge.

Round 6
This and the next round were the deciding fights. Gorg and two orcs made it over the hedge. Gorg attacked a human soldier, but the soldier managed to fend off his blows. One of his companions fell as the other orcs double teamed him, but the humans reacted quickly. One of the men at arms saw an opening and rushed Gorg from behind. Gorg never even saw the attack coming as he was focusing on the man before him. The man at arm's spear ripped through Gorg's armor and pierced his heart, instantly ending his life. At the same time, the archer pumped an arrow into one of the orcs that had just killed his friend. The remaining orc panicked, but had nowhere to flee, so held his ground.

Over at the hedge though, things went bad for the humans. Borom was locked into a battle with two orcs, and one of them managed to get past his defenses and landed a heavy blow that left Borom fighting with only half of his strength.

Round 7
Thing really went bad for the humans here. At the opening in the hedge, the orcs made a savage push and butchered 3 of the human defenders, and more importantly, Borom was once again overwhelmed, only this time with even worse results. A sword managed to find a gap in his armor and tore deep into his body. He dropped to the ground as his life slipped away. The remaining human warriors fought valiantly and killed two orcs, and the sole human archer took down one more. The human's morale was wavering, but they knew that if they fell back, that the people of this village would be massacred, so they held for a little longer.

Round 8
This round saw a complete resurgence for the humans. After seeing their leader so brutally murdered, they grew angry and leaped into action before the orcs could react. In their furry they cut down 3 orcs, and the archer turned his attention to the human archers who were still firing whenever they could. He took out one of the unarmored orc archers, and the remaining two send all of their arrows at the human archer, who took an arrow in the neck, and fell lifeless.

The remaining orcs were stunned by this sudden turn and fell back as their morale waivered.

Round 9
For a brief moment, the remaining orcs considered moving back in for an attack, but they were now outnumbered, and weary, so they decided to retreat and come back again when they could recover their strength.


Conclusion:
This game has a lot of cool mechanics, but I do not like the I Go U Go aspect. I like games that make combat simultaneous. The orcs would probably have won this game, but in Round 8, the humans acted first, and even though they were outnumbered two to one, they each managed to kill an orc, thus evening up the fight. Then the orcs rolled a bad morale test and fell back shaken.

However, the game was still a lot of fun, and rather easy to play. I used the "Fast Play" variant which is one the MJ12 Yahoo site(basically it drastically reduces the hits a figure has), and the whole fight lasted less than an hour. I think that I will run this again, but allow the defender to strike back unless he is ambushed or struck from behind.

Thursday, August 27, 2009

Vacation to Virginia - Civil War Sites

These are actually pictures from last year. We visited a couple of ACW sites, and I thought that I would share some pics in case anyone wanted to see them.

Pamplin Park - National Museum of the Civil War Soldier
I would highly recommend a visit to this park if you are in Virginia. The Museum of the Civil War Soldier is one of the best that I have been to. Even my kids enjoyed it. One of the things they do which is rather cool, is that at the beginning, you pick out a soldier to "be your guide". You get an MP3 player, and as you go through the museum, your soldier tells you some of his experiences. Then at the end of the tour, you get to find out what happened to the soldier that you were listening to. It was pretty cool, because it puts you in touch with that man. One of my daughters cried when she found out that here soldier did not survive the war.
This Picture is of a local, small plantation.
Firing a canon
Reconstruction of defensive structures around Petersburg and Richmond.

Manassas National Battlefield

I loved visiting this park. It was a nice day, and a well kept up park
.

Here is a statue of "Stonewall" Jackson.


This is the "Stone House", and if I remember right, it was used as a hospital during the battles. The house has been slightly modified since the war. It has A/C and electric.


A reenactor (if that's how you spell it), going over the operations of the rifle. I believe this is an 1861 Springfield, but not positive.

This was right outside of the visitor center, which was actually a rather nice visitor center. I have been to some that had very little information, and this one did pretty well.


Firing the rifle


Cannons set up along the Henry House Hill which played a major part in the first battle of Manassas

Wednesday, August 26, 2009

Save the Village using Showdown for Savage Worlds

Showdown is a skirmish system for Savage Worlds by Pinnacle Entertainment -link- I can't find the Showdown rules on their site now, but they used to be free.

I replayed the previous scenario using these rules and had problems from the start. To begin with, the rules don't have any example stats, so I had to make my own up, and I didn't do it well. I set either my attack dice too low, or my parry stat too high, because for the most part, the only way to hit was with a high roll. In this game, if you roll the highest number on any die, you get to roll that die again and add to the roll. This can continue until you roll anything other than the high number.

So, what happened was that the orcs closed to the hedges while suffering two casualties. The humans suffered none from the orcs bow fire. Then at the wall, the regular troops just bashed away on each other only causing an occasional casualty. The leaders had a little bit better luck because they had higher skills. I didn't finish the fight, because I knew that it was broken.

I will look through the Savage Worlds site and find some more info. I may modify my stats and run the fight again, because there are a couple of concepts that I like in the game, but at this point I am not too impressed.

My next try will be with ARES by MJ 12 games -link-

Monday, August 24, 2009

15mm Wargame with Warrior Heroes Armies and Adventure

I have done a couple of test games with WHAA, and this will be my first serious game.

This is a pretty basic scenario. The "good" guys are Lord Borom, and his forces which are defending a small village against an orc raiding forces lead by Gorg, and Morg.


The Good Guys
Lord Borom Quality 6, AC 5, 2 hand sword
2 Men at Arms Quality 5, AC4, Spears
3 Warriors Quality 4, AC 3, 2 Hand Axes
5 Warriors Quality 4, AC3, Hand Weapons
2 Archers Quality 4, AC2, Bows & Hand Weapons


The Bad Guys
Gorg & Morg Quality 5, AC 5 & 4, Hand Weapons
15 Warriors Quality 4, AC 3, Hand Weapons
3 Archers Quality 4, AC2, Bows and Hand Weapons


The battle began with Lord Borom and his forces just entering the village to defend it. Across the river, the orc forces were emerging from the forest.


Turn 1:
Both sides rolled and were able to activate. The humans moved towards the hedge row. The orcs moved towards the river. The orcs were breaking into two attack groups. One group was heading on the right (the top of the picture) and was trying to rush across the creek and to the hedges. The other was rushing across to the south, and trying to get to the opening at the hedge. They were leaving their three archers at the edge of the river to harass the defenders.

Turn 2:
Humans roll a 2 and activate everyone. Orcs roll 3 and move first. The archers, who had reached the river open fire. Miraculously they manage to take 1 warrior OOF. Others cross the river.
Humans take up position along hedge and in the opening.

Turn 3:

Humans roll 4, orcs roll 5. Orcs move first, but archers (Who are not with the leaders) do not activate because their Quality is too low.

Orcs clear river and start to move on the walls. The humans unload with archers, and on the orcs right 1 orc OD, and 1 OOF.


Turn 4:


Orcs roll 2, Humans 6. Everyone activates.

Bad rolls for humans give now results for archers. Orcs on the other hand manage to take one of the human archers OOF.


Turn 5:
I rolled 3 ties on activation, but finally got a 4 for orcs and 3 for humans. The orc right rushed the hedge and made contact. On the left the orcs moved closer. The orc archers took another human warrior with an OD result, and th
e remaining human archer took an orc warrior OOF. Then melee ensued. In the end the humans held the hedge, and the orcs were pushed back with 1 warrior OD.

Turn 6:
This turn things were joined in earnest. Once more the orcs got priority, and all of them charged again. On the right all of the remaining orcs crashed into the humans. As they charged, the human archer got off a shot and dropped one orc OOF. Then the orc leader pushed a defender back and was able to cross the hedge, but 1 more orc was OD.

On the orc left, not all of the orcs were a
ble to make contact, and it was a bad day for the ones that did. Two were OD and the others pushed back.

Turn 7:
This was the big turn of the fight! Humans rolled a 3 while orcs rolled a 1. Orc archers didn't have any target
s as all of their infantry were now in the way.

Humans moved first, and on the right one man at arms and the archer charged Morg who was now on their side of the hedge. The other 2 warriors continued to hold the wall. After a brief fight, Morg fell in battle. One of the orcs failed his "Leader Lost" test, but the other 3 held.

On the right, the humans rushed the orcs. A bloody fight ensued which saw 2 orcs down and 2 human warriors also down.


On the orc turn, they reengaged
on the left, and Gorg struck Lord Borom, but couldn't take him out.


Turn 8:
This was the final straw. Humans activated first with a 4, and orcs second with a 2. The human archer struck down one of the orcs who were trying to reach Morg's body. When the other 2 saw this, they broke.

On the left the orcs were cut down till all that was left was Gorg and two others. (I made them check morale and all stayed!).

However, when the final orcs moved back in, they got vengeance, dropping 2 warriors and 1 man at arms!

On the right, the last orcs could not charge and fell back.

Turn 9:
The end! The orcs rolled initiative first with every body activating. Gorg and his last three
companions charged. Lord Borom and his last soldier, however Borom was tougher than they thought, and two orcs went OOF. Gorg choose to stay and finish the fight.

At the same time, the orc archers fired upon the other defenders, and the last human archer got fed up with this and fired, dropping one orc. The others decided it was time to leave.

In the last fight of the day, Borom and his companion attacked Gorg, and butchered him, and thus the orc raid met with failure!

Starting my Blog

Well, like so many before me, I will be starting a blog here. I am a fan of miniature wargames of almost all genres. I collect fantasy, WWII, ACW and some Sci Fi. I do 15mm and 25mm, and will be posting more stuff on this blog.